Gluten Free Self Raising Flour in local stores feels like a never-ending search. I’ve been there standing in the baking aisle, scanning every shelf, only to realize it’s not available. When you’re craving warm biscuits, fluffy pancakes, or soft breads, the missing ingredient can be so frustrating. Especially if you love making Southern-staples but need them completely gluten-free, it can feel like you’re stuck.
That’s why I decided to learn how to make Gluten-Free Self-Rising Flour at home, and it turned out to be a game changer. In this post, I’ll share an easy, quick method so you can make your own without stress. You’ll be able to enjoy your favorite recipes—whether it’s breakfast pancakes, homemade breads, or warm biscuits—anytime you want. With a few simple steps, you’ll have this essential baking blend ready, and your kitchen will never run out of it again.
Making Self Rising Flour:
Understanding the science behind self-rising flour is crucial for success. Traditional self-rising flour combines soft wheat flour with baking powder and salt in precise ratios. The soft wheat provides a lower protein content compared to all-purpose flour, creating more tender results in baked goods.
For our gluten-free version, we need to replicate this balance carefully. The key lies in using less binding agent than typical gluten-free flour blends while incorporating slightly more baking powder than conventional recipes call for. This adjustment prevents the dense, gummy texture that can plague gluten-free baking while ensuring proper rise and lift in your finished products.
The binding agents in gluten-free flour can sometimes create an unpleasant, chewy consistency when overused. By reducing their quantity and compensating with additional leavening, we achieve results that closely mirror traditional wheat-based versions.
About the Ingredients for Gluten-Free Self Rising Flour:
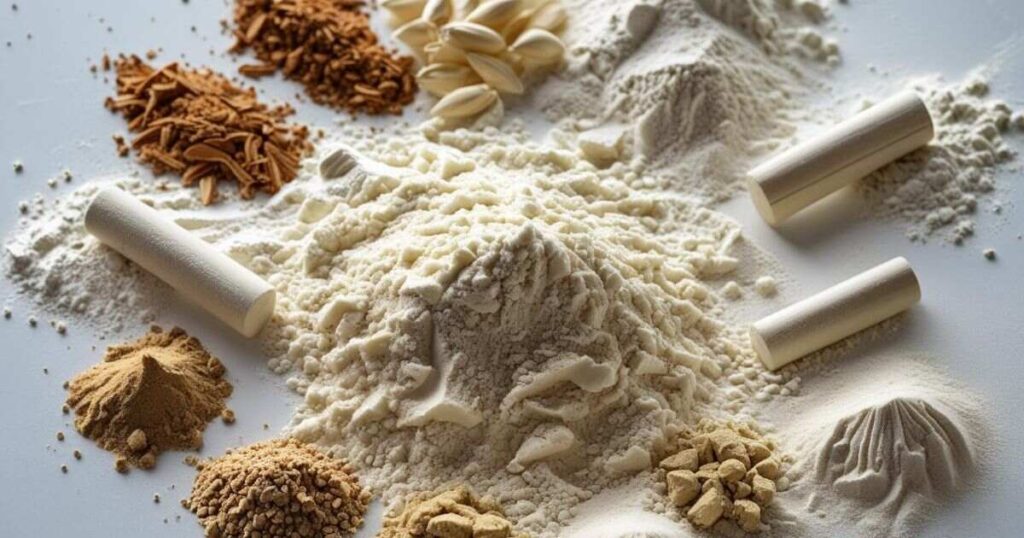
Binding Agent Selection: The choice of binder significantly impacts your final results. My preferred approach combines psyllium husk powder (60%) with potato starch (40%) for a gum-free solution. This combination provides excellent binding without the sometimes artificial taste of commercial gums. However, xanthan gum or guar gum work perfectly if you prefer convenience or already have them on hand.
If you’re working with a pre-made gluten-free flour blend that already contains binding agents, skip the additional binder in this recipe. Different recipes have varying binder requirements, so adjust accordingly based on what you’re making.
Flour Components: Quality matters tremendously when selecting your flour base. Always choose finely ground options – coarse meals or roughly ground flours will create grainy, unpleasant textures in delicate baked goods like biscuits or muffins. Sweet rice flour from reputable sources provides exceptional results and creates a smooth, professional finish.
Leavening Agent: Fresh baking powder is non-negotiable for proper rise. Even baking powder that’s only slightly past its prime can result in flat, dense baked goods. Replace your baking powder every 6 months for optimal performance.
Commercial Options: Quality store-bought gluten-free flour blends like King Arthur Measure for Measure or Pamela’s Artisan Flour Blend produce excellent results in this recipe. While homemade flour blends often provide superior texture and flavor, these commercial options offer convenience without significant compromise in quality.
May You Like Also: Dairy Free Rice Krispie Treats
Don’t Skimp on the Mixing Time for Gluten-Free Flours!
Proper mixing is absolutely critical for gluten-free self-rising flour success. The 10-minute mixing time in a food processor or stand mixer isn’t arbitrary – it ensures complete distribution of leavening agents throughout the flour blend.
Inadequate mixing creates pockets of concentrated baking powder, leading to uneven rise and bitter spots in your baked goods. The rising agents must be 100% evenly distributed for consistent results across every portion of your flour blend.
If your food processor begins to warm during the mixing cycle, pause for 2-3 minutes to prevent overheating. This break won’t affect the final product but protects your equipment.
When creating your own gluten-free flour blend simultaneously with the self-rising mixture, combine all steps into one mixing session for efficiency.
How to tell if your baking powder is still good:
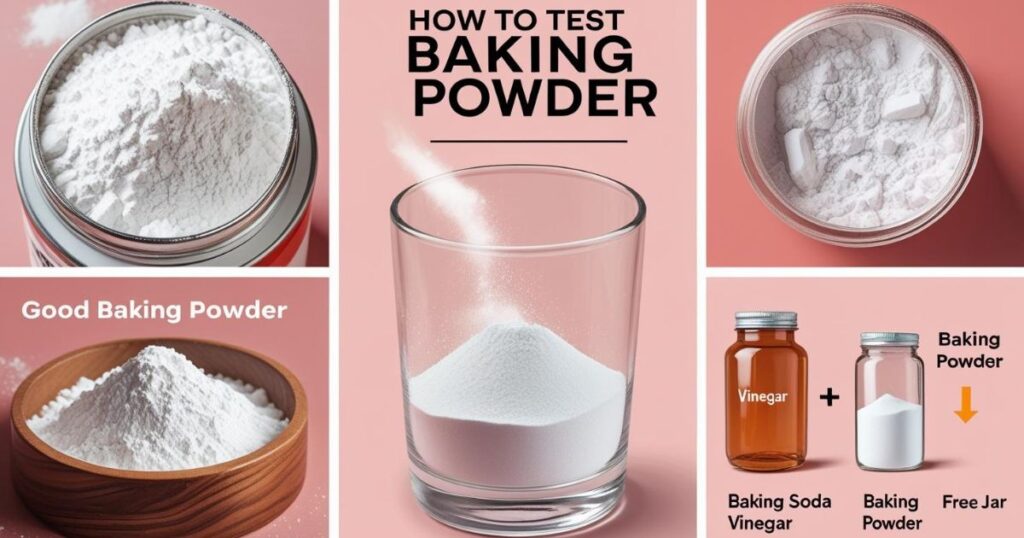
Testing baking powder freshness takes just minutes and prevents baking disasters. Place ½ teaspoon of baking powder in a clean cup or small bowl. Pour ¼ cup of boiling water directly over the powder.
Fresh baking powder will bubble rapidly and vigorously as soon as the hot water hits it. The bubbling may subside quickly – this is normal and doesn’t indicate a problem. Expired baking powder produces minimal bubbling or none at all, signaling it’s time for replacement.
Perform this test every few months, especially before important baking projects. Fresh ingredients are the foundation of successful gluten-free baking.
Gluten Free Self-Rising Flour
This homemade gluten-free self-rising flour delivers consistent, reliable results for all your favorite Southern-style baked goods. The carefully balanced formula ensures proper rise without the dense, heavy texture often associated with gluten-free alternatives.
Prep Time: 3 minutes
Mixing Time: 10 minutes
Course: Baking Essential
Cuisine: American
Yield: 1 cup
Calories: 406 kcal
May You Like Also: The Best Rice Krispie Treats Recipe
Equipment
- Food processor or stand mixer
- Measuring cups and spoons
- Airtight storage container
Ingredients US Customary Metric 1x 2x 3x
- 1 cup gluten-free flour blend (homemade or quality store-bought)
- 1½ teaspoons baking powder (fresh)
- ½ teaspoon fine sea salt
- 1 teaspoon baking binder (only if your flour blend doesn’t contain binding agents)
Instructions
Combine all ingredients in your food processor or stand mixer bowl. Process continuously for a minimum of 5 minutes, with 10 minutes being optimal for best results.
The extended mixing time ensures complete integration of leavening agents throughout the flour mixture. Store the finished self-rising flour in an airtight container in a cool, dry location.
Notes
This gluten-free self-rising flour maintains peak freshness for up to 1 month when stored properly. The recipe scales easily – double or triple quantities as needed for larger batches.
Always verify your base flour blend doesn’t already contain binding agents before adding extra binder to prevent overly dense results. Fresh ingredients, especially baking powder, are essential for optimal rise and flavor.
Nutrition
Calories: 406kcal
Carbohydrates: 90g
Protein: 12g
Fat: 4g
Sodium: 1,168mg
Fiber: 12g
Potassium: 606mg
Calcium: 341mg
Iron: 5mg
Frequently Asked Questions
Is there a self-rising gluten free flour?
Yes, self-rising gluten-free flour is available from brands like King Arthur and Bob’s Red Mill, though making your own homemade blend often provides better texture and freshness.
What is a substitute for gluten free self raising flour?
Combine 1 cup gluten-free flour with 1½ teaspoons baking powder and ½ teaspoon salt, or use regular all-purpose flour with the same leavening agents if gluten isn’t a concern.
Does gluten free self raising flour work?
Gluten-free self-rising flour works excellently when properly formulated with the right binding agents and fresh baking powder, producing light, fluffy biscuits and quick breads.
How to convert gluten free plain flour to self-raising flour?
Add 1½ teaspoons baking powder and ½ teaspoon salt to every 1 cup of gluten-free plain flour, plus 1 teaspoon binding agent if your flour blend lacks xanthan gum or guar gum.
What is a substitute for self-rising flour?
Mix 1 cup all-purpose flour with 1½ teaspoons baking powder and ½ teaspoon salt, or use cake flour with the same leavening ratio for more tender results.
How to get gluten free flour to rise?
Ensure fresh baking powder, proper binding agents like xanthan gum, and thorough mixing for at least 5-10 minutes to distribute leavening agents evenly throughout the flour blend.
Conclusion
Creating your own gluten-free self-rising flour transforms your baking game completely. With the right flour blend, fresh baking powder, and proper mixing technique, you’ll achieve the same fluffy texture and perfect rise as traditional wheat-based recipes. The 10-minute mixing rule and quality binding agents make all the difference in your final results.This homemade flour blend stays fresh for up to one month and works beautifully in biscuits, pancakes, and quick breads. Save money while controlling every ingredient – your Southern classics will taste just as amazing as the originals, proving that gluten-free baking doesn’t mean compromising on flavor or texture.

I’m Michael Alexander. A content writer and SEO Expert with 2 years of Experience. I have already worked with the BBC News Website.