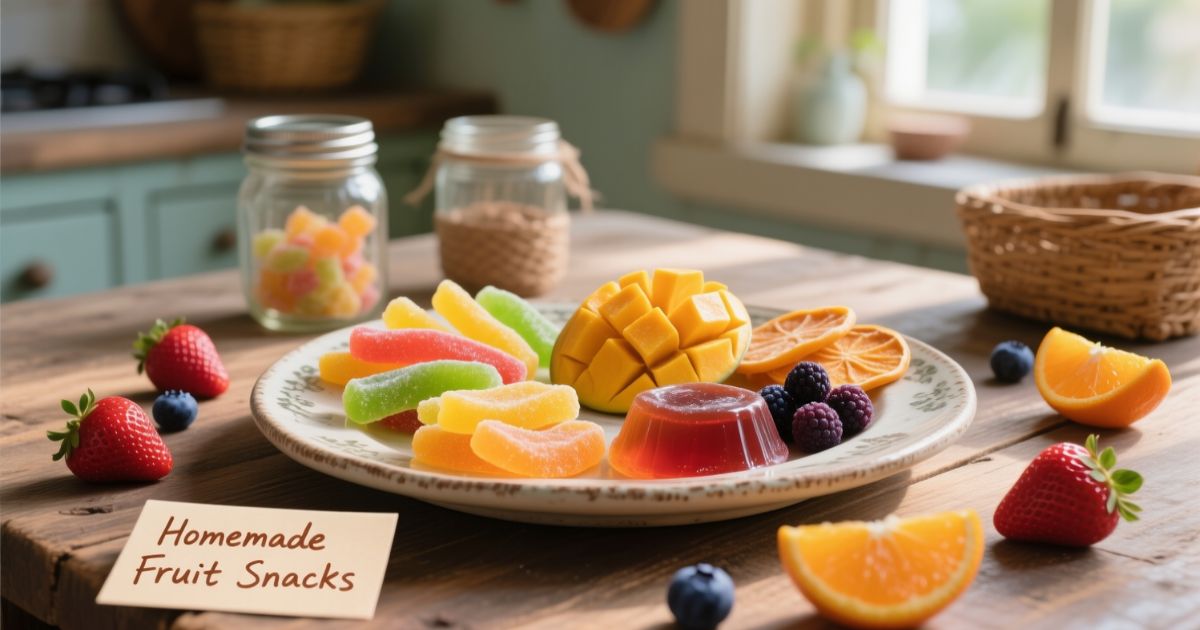
Homemade Healthy Fruit Gummies sounded like a Pinterest fantasy to me until I found myself reading ingredient labels on store-bought snacks and realizing how much sugar and artificial stuff was packed inside. I used to think healthy snacks had to be boring or tasteless, but I was wrong. One day, I tried making my own gummies at home, and honestly, it changed how I think about snacking. They turned out delicious, colorful, and even my little cousins loved them.
I’ll show you exactly how to make your own homemade healthy fruit gummies using natural ingredients and real fruits no weird chemicals or fake colors. Whether you’re a parent trying to sneak some nutrition into your kids’ lunchboxes or just someone trying to snack smarter, this guide is packed with simple steps, tips, and everything you need to get started. Let’s make something fun, tasty, and actually good for your body!
Homemade Fruit Snacks: Ingredients & Substitutions
The great thing about this recipe is that while the method requires attention to particular details, the ingredients remain fairly versatile. You can customize flavors based on seasonal availability and personal preferences.
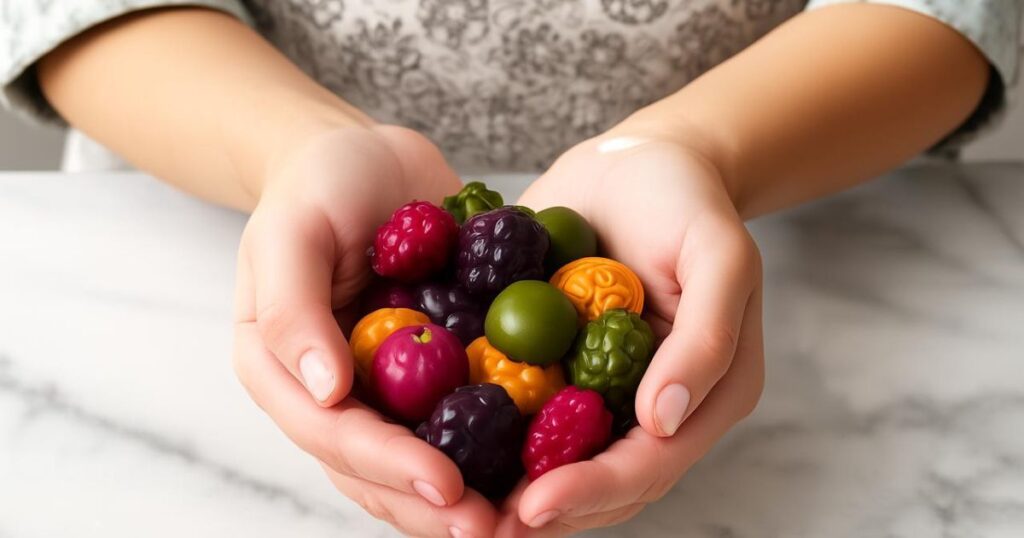
Fruit selections offer endless possibilities. Use the suggestions for different fruits to achieve specific colors, but let your preferences drive your choices. However, you cannot use Kiwi or Pineapple as they contain the enzyme bromelain, which breaks down proteins in gelatin and will prevent proper setting.
Vegetables provide the same freedom – this rule applies to any of your favorites. Each mixture contains 1 cup of fruit and ¼ cup of vegetables, though you can omit vegetables entirely if preferred.
For the liquid component, choose organic, unsweetened juice of your variety and choice. Apple juice works excellently due to its neutral color and flavor, but any option will work beautifully.
Raw vs. Cooked Vegetables
All vegetables in these combinations blend perfectly when used raw, including beets which might surprise some cooks. If you decide to use heartier options like sweet potatoes, I recommend cooking them first until soft, then using the puree in this recipe.
Raw vegetables blend more easily and maintain their nutritional integrity, while cooked vegetables may require additional liquid to achieve the proper consistency.
How to Make Homemade Fruit Snacks
Let’s walk through how to make homemade fruit snacks step by step. Don’t forget to watch the video for visual guidance that makes the process even clearer.
Lay Out Supplies & Materials
Begin by putting your silicone molds on a large baking sheet, or line an 8×8 square dish with wax paper or silicone mat. Lightly grease the surface and set aside for later use.
Having everything organized before you start ensures smooth preparation, especially since the mixture sets quickly once cooled.
May You Like Also: Easy Homemade Mojo Sauce
Make the Fruit Snack Mixture
I’ll share how to make green, red, orange, and blue/purple fruit snacks in this recipe. You can really use any combination of fruits and vegetables you prefer.
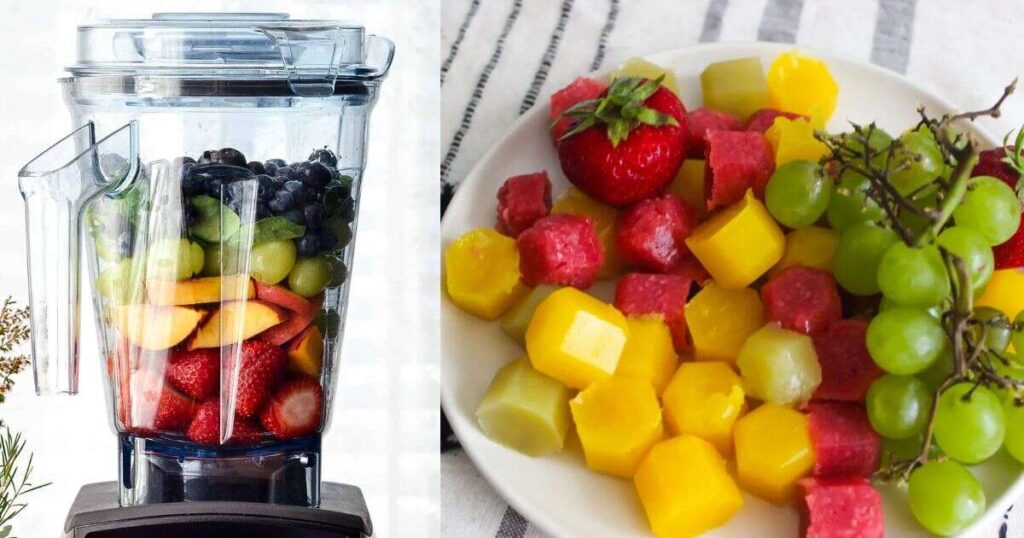
Use a Vitamix.
To ensure the snacks turn out perfectly smooth, use a high-powered blender. I always recommend using a Vitamix for optimal results.
Begin putting the fruit, vegetable, and ¼ cup apple juice in the container of your blender and secure the lid. Turn the machine on and slowly increase the speed to high. Blend on high until the mixture becomes completely smooth.
Add more juice 1 Tablespoon at a time if necessary until the mixture reaches the perfect consistency.
For green snacks, combine grapes and spinach (or zucchini). The ingredients transform from separate items before blending into a vibrant mixture after processing.
To create red varieties, use strawberries and beets for stunning color and flavor.
Orange snacks come together beautifully with peaches and carrots.
For blue or purple hues, blend blueberries with zucchini.
After achieving smoothness, add honey and vanilla and blend until incorporated. Taste the mixture and adjust sweetness as desired.
Once perfectly smooth, transfer to a small saucepan and whisk in the gelatin thoroughly.
dissolve gelatin completely
Heat on medium temperature until the gelatin is fully dissolved and the mixture is no longer grainy when touched (about 3 minutes). Make sure it does not boil.
When gelatin is added to the fruit/veggie mixture, it will become cloudy. Cook over medium heat until no longer cloudy, maintaining careful temperature control.
Test for doneness by placing some mixture between your pointer finger and thumb, then rub them together. If it feels even slightly grainy, continue cooking and whisking. When it feels smooth, you can begin to fill the molds.
Using a dropper, fill the silicone molds carefully, or pour your mixture into your prepared baking pan. I suggest keeping the saucepan on the warm burner (with heat source turned off) as you work. This way the mixture remains slightly warm and cools more slowly.
Work quickly since the mixture begins to thicken as it cools. Transfer to the refrigerator to set for at least 2 hours.
Once set, remove from molds and enjoy. If you don’t have molds, simply spread the mixture in an 8×8″ pan lined with wax paper. Let the snacks set, then cut with a warm, sharp knife.
Serve
I suggest serving these fruit snacks slightly chilled or at room temperature for the best texture and flavor experience.
Store/Freeze
Homemade fruit snacks can be stored in an airtight container in the refrigerator for up to one week, or in the freezer for 2 months. Thaw slowly in the refrigerator before serving for optimal texture.
May You Like Also: Easy Ricciarelli Honey Recipe
Homemade Fruit Snacks Recipe FAQs
Is Gelatin Good For You?
Yes, the protein in this recipe comes from high-quality, grass-fed, collagen beef gelatin containing 17 grams per scoop (about 1 TBS).
How do I store homemade fruit snacks?
Store these in the refrigerator for up to 2 weeks in an airtight container.
How long do homemade fruit snacks last?
They last up to 2 weeks refrigerated or 2 months frozen.
Can I freeze these homemade fruit snacks?
Yes, freeze in an airtight container for up to 2 months.
Homemade Fruit Snacks Recipe
Equipment
- Vitamix blender
- Fruit snack molds
- Measuring spoons
- Measuring cups
- Spatula
Ingredients US CustomaryMetric 1x2x3x
- 1 cup fruit, chopped
- ¼ cup vegetables, chopped (and peeled if necessary)
- ¼ to ½ cup pure apple juice (no added sugar)
- 2 Tablespoons raw honey
- ¼ teaspoon pure vanilla extract
- 3 Tablespoons gelatin (preferably collagen, grass-fed)
Green:
- 1 cup green grapes
- ¼ cup spinach
Red:
- 1 cup strawberries, diced
- ¼ cup beets
Orange:
- 1 cup peaches, chopped
- ¼ cup carrots
Blue/purple:
- 1 cup blueberries
- ¼ cup zucchini
Instructions
- Place silicone molds on large baking sheet or line 8×8 square dish with wax paper and lightly grease; set aside.
- Place fruit, vegetable, and ¼ cup apple juice in container of high powered blender (Vitamix) and secure lid.
- Turn machine on and slowly increase speed to high. Blend until mixture is smooth. (Add more juice 1 Tablespoon at a time if necessary until mixture reaches smooth consistency).
- Add honey and vanilla and blend until smooth.
- Taste mixture and add more honey if desired.
- Transfer mixture to small saucepan and whisk in gelatin.
- Heat on medium until gelatin is dissolved and mixture no longer grainy (about 3 minutes). Make sure it does not boil.
- Using dropper, fill silicone molds or pour mixture into prepared baking pan. (I suggest keeping saucepan on warm burner with heat source turned off so mixture remains slightly warm and cools slowly).
- Transfer to refrigerator to set for at least 2 hours.
- Once set, remove from molds and enjoy. If using baking dish, remove from dish, cut, and serve or store.
Homemade Fruit Snacks
Notes
*Tip on doneness: To ensure gelatin is dissolved, put small amount on thumb. Then rub thumb and pointer finger together. If smooth, gelatin is dissolved. If grainy, keep cooking.
Ingredient Substitutions:
Fruit: I’ve given suggestions for different fruits used to make each color, but you can let your preferences drive your choices here. The only two fruits you cannot use are Kiwi and Pineapple. They contain enzyme bromelain which breaks down proteins in gelatin and will prevent setting up.
Vegetables: The same freedom applies with vegetables – use your favorites. Each mixture contains 1 cup fruit and ¼ cup vegetables. You can use all fruit if you don’t want to add vegetables.
Juice: I highly recommend using organic, unsweetened juice variety of your choice. I chose apple because it has neutral color and flavor, but you can use any flavor you like.
Store: Store homemade snacks in airtight container in refrigerator for up to 2 weeks, or in freezer for 2 months.
Nutrition
Serving: 0.25 cup | Calories: 57.7 kcal | Carbohydrates: 10.5 g | Protein: 4.5 g | Fat: 0.1 g | Polyunsaturated Fat: 0.1g | Sodium: 28.8 mg | Potassium: 84.7 mg | Fiber: 0.8 g | Sugar: 9.1 g | Vitamin A: 10 IU | Vitamin C: 20.4 mg | Calcium: 6 mg | Iron: 0.2 mg
Frequently Asked Questions
What fruits make good snacks?
Any fresh fruits work well except kiwi and pineapple, which contain enzymes that prevent gelatin from setting properly.
How long will homemade fruit snacks last?
Homemade fruit snacks last up to 2 weeks in the refrigerator or 2 months in the freezer when stored properly.
How to make your own fruit sweets?
Blend fruits with vegetables, add honey and gelatin, heat until dissolved, pour into molds, and refrigerate for 2 hours.
What are the ingredients in fruit snacks?
The main ingredients are 1 cup fruit, ¼ cup vegetables, apple juice, honey, vanilla extract, and 3 tablespoons gelatin.
Are 100% fruit snacks healthy?
Yes, these homemade fruit snacks are healthy as they contain whole fruits, vegetables, and 4.5 grams of protein per serving.
Which two fruits make a great snack?
Strawberries and blueberries make an excellent combination, providing antioxidants and natural sweetness in homemade fruit snacks.
Conclusion
Making homemade fruit snacks is surprisingly simple and incredibly rewarding. These healthy, high-protein treats prove that natural ingredients create the most delicious results while avoiding artificial additives found in store bought varieties. With just whole fruits, vegetables, and basic pantry items, you can craft nutritious snacks your family will actually love.
The beauty of this recipe lies in its flexibility – experiment with different fruit and vegetable combinations to discover your perfect flavors. Store them easily for quick snacks throughout the week, knowing you’re providing better nutrition than any commercial option.

I’m Michael Alexander. A content writer and SEO Expert with 2 years of Experience. I have already worked with the BBC News Website.